 oraclecloud使用ubuntu配置
# 由于安装的是 minimal 的 ubuntu,缺少一些常用工具
sudo apt update
sudo apt install vim
sudo apt install iputils-ping
sudo apt install lrzsz
1
2
3
4
2
3
4
# 默认使用的密钥登录,可以改为 root 账户密码登录:
- 已经登录上了:
sudo -i切换到 root
vim /etc/ssh/sshd_config
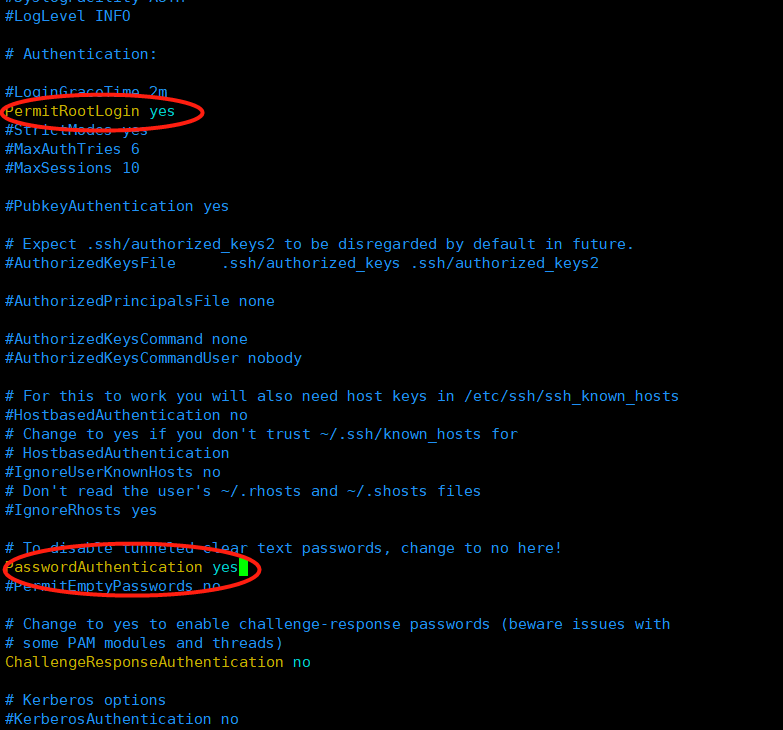
sudo service sshd restart或者sudo service ssh restart
- 创建 VPS 时设置:
创建 oracle 实例的时候,在下面的”管理“菜单中找到初始化脚本行,粘贴以下命令,则在创建后直接可以使用 root 账号登录 VPS,登录的密码是 yourpassword,所以使用以下命令行记得改成你自己的密码!
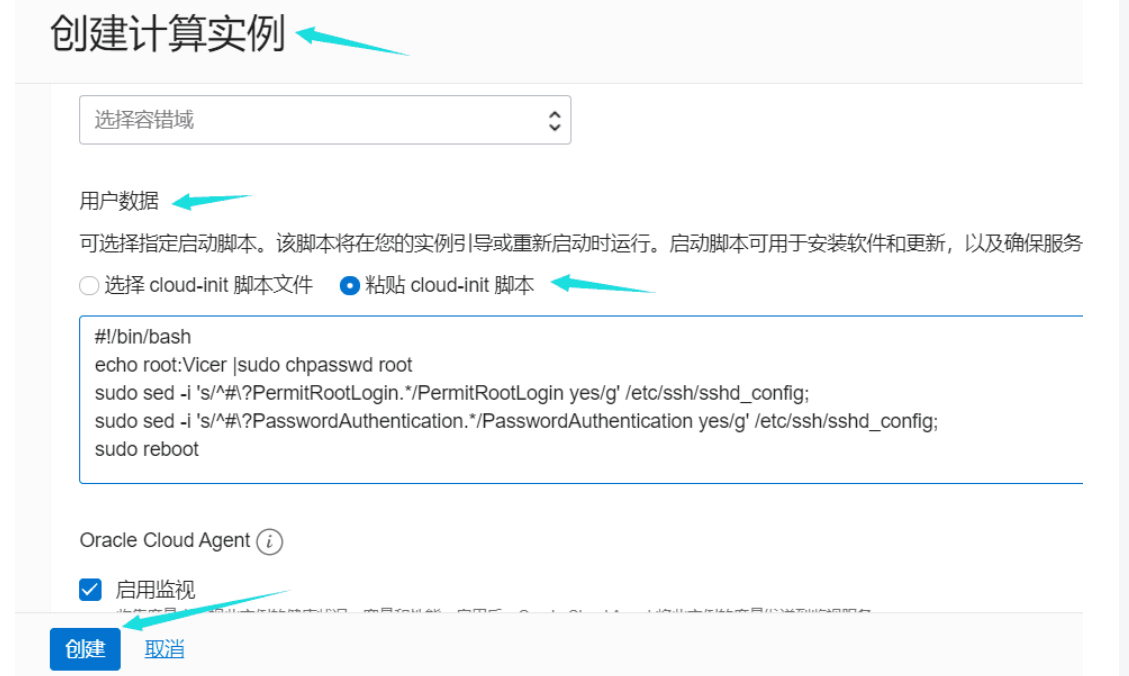
#!/bin/bash
echo root:yourpassword |sudo chpasswd root
sudo sed -i 's/^#\?PermitRootLogin.*/PermitRootLogin yes/g' /etc/ssh/sshd_config;
sudo sed -i 's/^#\?PasswordAuthentication.*/PasswordAuthentication yes/g' /etc/ssh/sshd_config;
sudo service sshd restart
1
2
3
4
5
2
3
4
5
注意,我这个版本还需要开启一下配置,才能用密码登录,附上完整的指令。
vim /etc/ssh/sshd_config
# 允许密码认证
PasswordAuthentication yes

# 允许 root 用户使用密码登录
PermitRootLogin yes

# 允许 PAM 认证
UsePAM yes

# 保持公钥认证开启(推荐)
PubkeyAuthentication yes
# 允许键盘输入,这个一定要记得打开,试了很多次不行,结果是这里没打开
KbdInteractiveAuthentication yes
1
2
3
4
5
6
7
8
9
10
11
12
13
2
3
4
5
6
7
8
9
10
11
12
13
- 设置 root 密码:
sudo passwd root sudo systemctl restart ssh
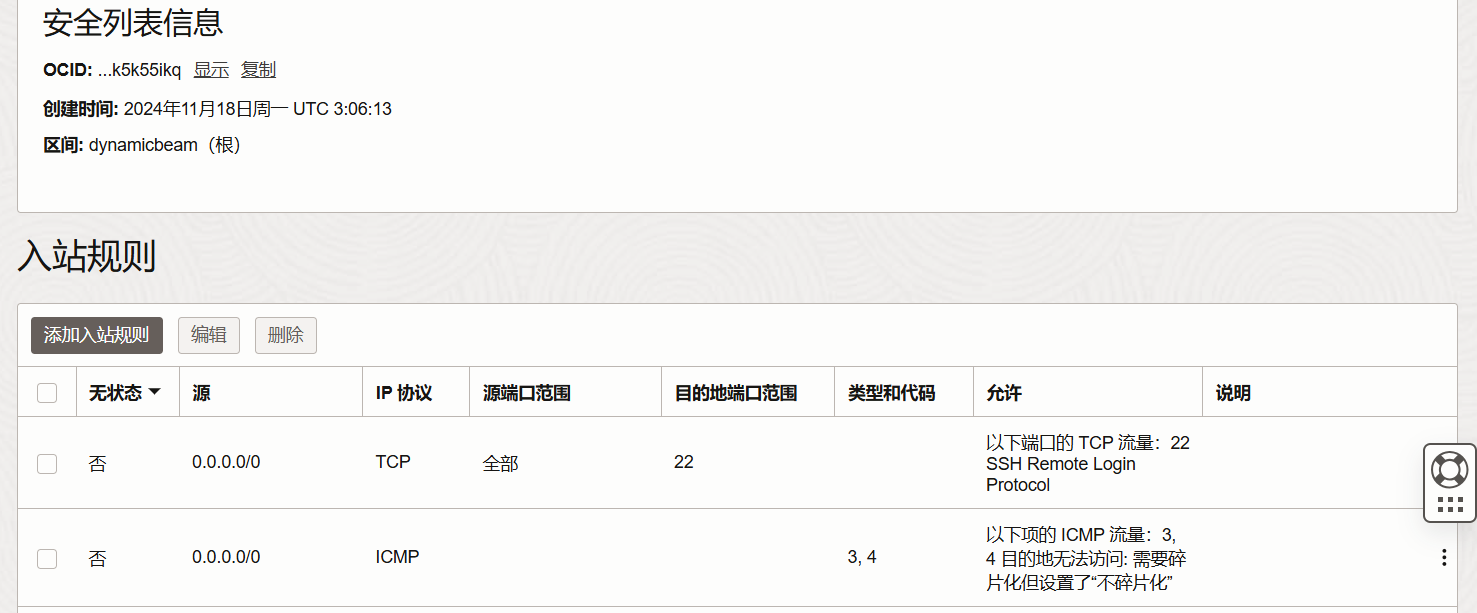
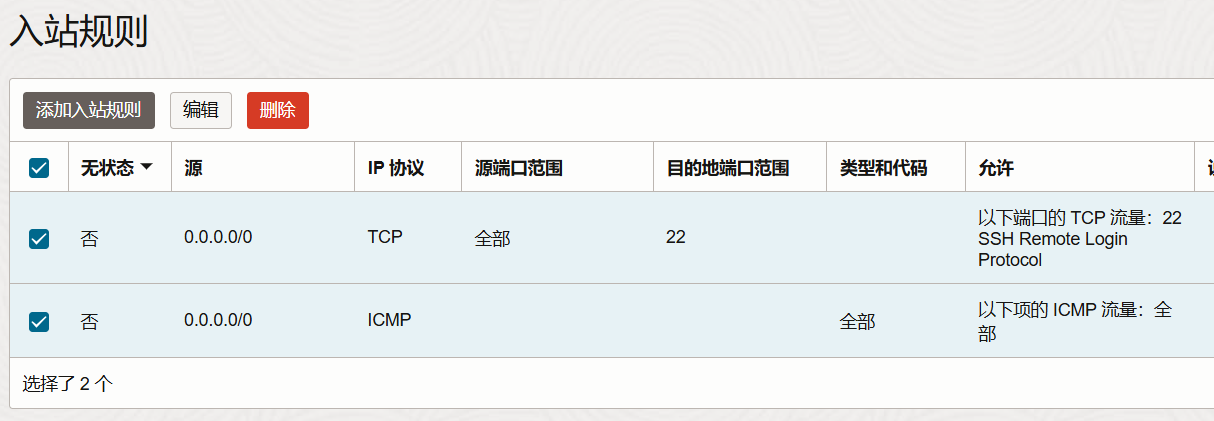
# 防火墙开放相应的规则
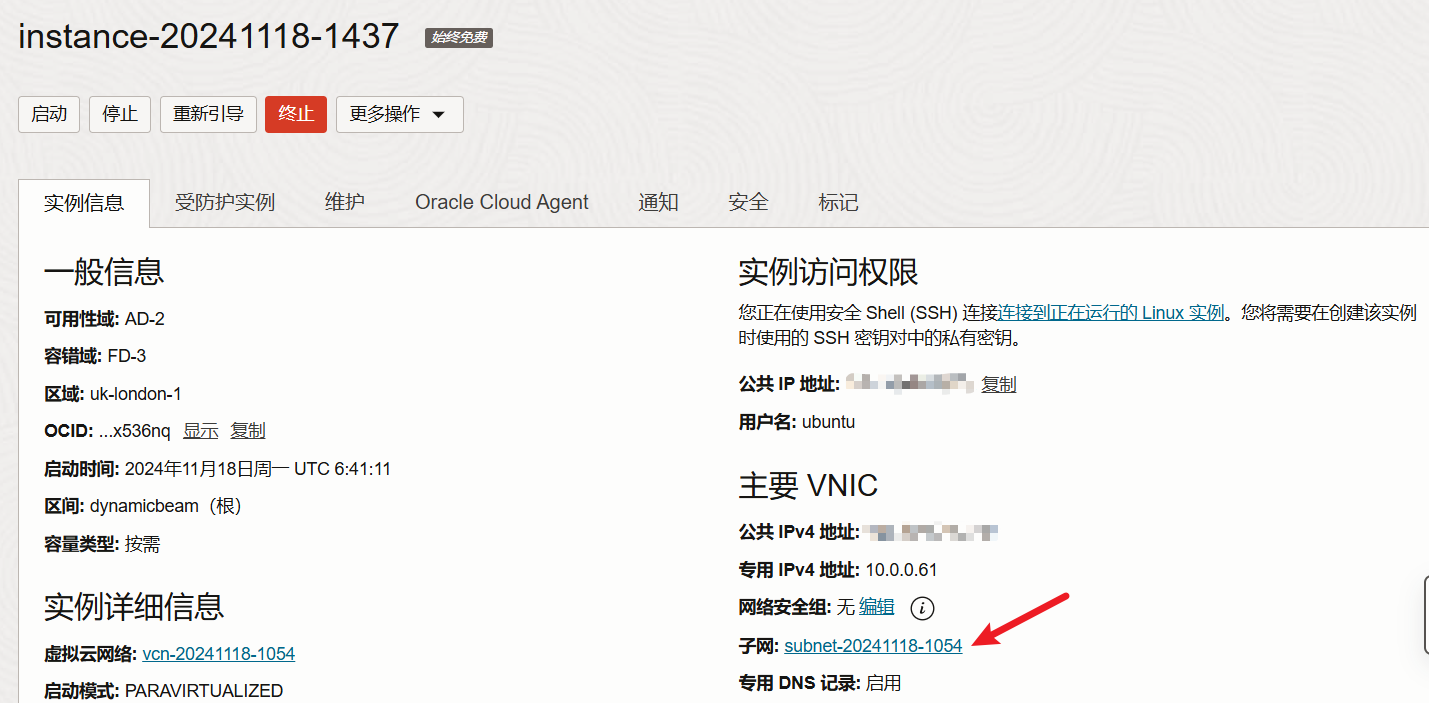
点击进入安全列表,添加入站规则:
# 安装 docker
# 1. 安装必要的依赖
在安装 Docker 之前,我们需要安装一些必要的依赖包。运行以下命令:
sudo apt install apt-transport-https ca-certificates curl software-properties-common
1
# 2. 添加 Docker 的官方 GPG 密钥
通过以下命令添加 Docker 的官方 GPG 密钥,以确保下载的软件包的完整性:
curl -fsSL https://download.docker.com/linux/ubuntu/gpg | sudo apt-key add -
1
# 3. 添加 Docker 的 APT 源
接下来,我们需要添加 Docker 的 APT 源到您的系统中:
sudo add-apt-repository "deb [arch=amd64] https://download.docker.com/linux/ubuntu $(lsb_release -cs) stable"
1
# 4. 更新 APT 包索引
添加源后,更新 APT 包索引:
sudo apt update
1
# 5. 安装 Docker CE
现在可以安装 Docker 社区版(Docker CE):
sudo apt install docker-ce
1
# 6. 验证 Docker 是否安装成功
安装完成后,您可以运行以下命令来验证 Docker 是否成功安装:
sudo systemctl status docker
1
如果 Docker 正在运行,您将看到类似以下的输出:
● docker.service - Docker Application Container Engine
   Loaded: loaded (/lib/systemd/system/docker.service; enabled; vendor preset: enabled)
   Active: active (running)
1
2
3
2
3
systemctl enable docker
1
# 关闭防火墙
# 开放所有端口

iptables -P INPUT ACCEPT
iptables -P FORWARD ACCEPT
iptables -P OUTPUT ACCEPT
iptables -F

# 删除防火墙

apt-get purge netfilter-persistent && reboot
或 rm -rf /etc/iptables && reboot
1
2
3
4
5
6
7
8
9
10
11
2
3
4
5
6
7
8
9
10
11
# 卸载oracle-cloud-agent
# Centos
yum remove oracle-cloud-agent
yum remove oracle-cloud-agent-updater

# Ubuntu
snap remove oracle-cloud-agent
snap remove oracle-cloud-agent-updater
1
2
3
4
5
6
7
2
3
4
5
6
7
# 安装 nginx
sudo apt update
sudo apt install nginx
sudo systemctl enable nginx
1
2
3
2
3
默认目录
- nginx 的默认配置目录为:
/etc/nginx - 默认日志目录为:
/var/log/nginx - 默认应用目录为:
/var/www/html
# 安装xray服务
- 修改服务配置文件:
sudo vim /etc/systemd/system/xray.service
1
[Unit]
Description=Xray Service
After=network.target
Wants=network.target

[Service]
Type=simple
User=root
WorkingDirectory=/root/xray
ExecStart=/root/xray/xray -c /root/xray/config-serv.json
Restart=always
RestartSec=5

# 添加日志配置
StandardOutput=append:/var/log/xray/access.log
StandardError=append:/var/log/xray/error.log

[Install]
WantedBy=multi-user.target
1
2
3
4
5
6
7
8
9
10
11
12
13
14
15
16
17
18
19
2
3
4
5
6
7
8
9
10
11
12
13
14
15
16
17
18
19
创建日志目录 sudo mkdir -p /var/log/xray sudo chmod 755 /var/log/xray
设置服务文件权限 sudo chmod 644 /etc/systemd/system/xray.service
重新加载服务配置 sudo systemctl daemon-reload
启动服务 sudo systemctl start xray
设置开机启动 sudo systemctl enable xray
常用管理命令:
# 查看服务状态
sudo systemctl status xray
# 停止服务
sudo systemctl stop xray
# 重启服务
sudo systemctl restart xray
# 查看日志
sudo journalctl -u xray -f
# 禁用开机启动
sudo systemctl disable xray
1
2
3
4
5
6
7
8
9
10
2
3
4
5
6
7
8
9
10
上次更新: 2024-12-30 08:25:23